

But I'm not holding my breath: my neighborhood is about as far north as you can get and still be considered Raleigh. Until I get that phone call, the only high-speed option I have is RoadRunner through TimeWarner Cable. I currently pay $110/month for what is supposed to be 300mbps/100mbps download/upload speeds, but I rarely see speeds above 50mbps/10mbps.
What makes this more painful is the amount of money and effort I've invested in hardware over the years to make sure that I can squeeze the most bandwidth possible from RoadRunner. First it was a DOCSIS 2.0 modem, then a DOCSIS 3.0 modem, and an ASUS gigabit router gave way to the Google OnHub router. About $700 in equipment over the past four years, I'd guess, to get bandwidth that any entry-level hardware could also support. Perhaps it's just morbid curiosity, but I want to quantify just how bad my service is compared to what I pay to receive it.
After digging through multiple services and approaches, I settled on a library (Speedtest CLI) that interfaces with the well-known speed testing service provided by Ookla, at speedtest.net. The library looks to be well-maintained based on the number of commits, contributors, and date of updates. Speedtest.net is not without its problems, as ISP's know that it is a popular service and can (and do) prioritize traffic to it so as to overstate bandwidth. But it was the best free, programmatic option I could find that fit my needs.
Prerequisites: a configured Raspberry Pi. You can follow steps 1, 2, and 3 on my Pi-hole post to get a new Pi up and running.
Not all Python packages are available or updated in the Raspbian archives, so you can install packages from the Python Package Index (PyPI) using the pip tool. The pip tool is installed by default on Raspbian Jessie (but not Wheezy or Jessie Lite), so installing Speedtest CLI is as simple as entering the following on your Pi's command line:
sudo pip install speedtest-cli
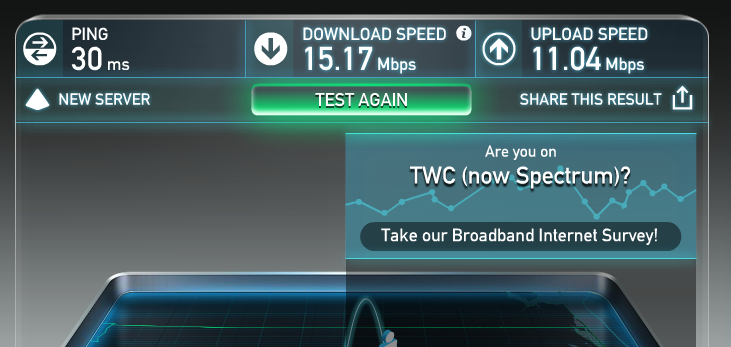
Then enter "speedtest-cli" to run a speed test. The below test shows that I'm currently getting speeds of 38mbps/21mbps, which falls in line with what I've observed my connection speeds to be for downloads, but quite a bit faster than what I'm accustomed to seeing on uploads.

The easiest option to run these tests over and over without intervention is through a shell script. A shell script is a text file that contains a series of commands that are executed by the BASH shell. The shell reads the script file and executes the commands just like they were input directly on the command line. First create a directory to hold the script and the output:
mkdir ./speedtest
Then open the directory:
cd ./speedtest
Create a file to hold the script, opening it in the nano editor:
sudo nano run_speedtest.sh
With the file open in nano, enter the below script, which executes the speed test, and directs the output to a log file stored in the directory you just created. As of November 2016, the author of the CLI libray introduced several different output formats, including CSV (comma-separated values). The CSV format is supported by spreadsheet programs like MS-Excel and Google Sheets to make it easy to import this data for further analysis and graphing. I think we can all agree that we need more charts and graphs in our lives.
#!/bin/bash
/usr/local/bin/speedtest --csv >> /home/pi/speedtest/speedtest.log
Press Ctrl+X to exit, and then hit Y and enter to save the file. Once your script is created, you need to give it execute permissions so that it can run:
sudo chmod 755 run_speedtest.sh
Running the script with the –csv switch produces the output below, which can be observed by opening the speedtest.log file. It might not look pretty, but it’s the perfect format for importing into Excel. Querying the headers shows us that each line contains: server ID (5401), sponsor (Suddenlink Communications), server name (Rocky Mount, NC), timestamp (2017-01-20 17:00:02, which must be GMT, as that query ran at noon my time), distance (62?), ping (37ms), download (33mbps), and upload (22mbps).

To make this worthwhile, I want a fair number of data points, so I want this script to run every 30 minutes. Task scheduling is a job for cron, a tool for scheduling commands or scripts to run periodically and at fixed intervals. The basic layout of cron job is minute | hour | day of month | month | day of week | command-to-execute (without the pipe character). So "30 2 * 2 * myscript" would run "myscript" at minute 30, hour 2, every day of month, of month 2, every day of week. Or, in plainer terms, every day in February at 2:30 AM. To open crontab, enter:
crontab -e
The first time you run crontab, you'll be prompted to select an editor; option 2 is nano, which is the simplest of the presented options. Because I want my script to run every 30 minutes indefinitely, I entered the below:
0,30 * * * * /home/pi/speedtest/run_speedtest.sh
Press Ctrl+X to exit, and then hit Y and enter to save the file.
Every 30 minutes, a speed test will be run, and results will be appended to the "speedtest.log" file stored in the directory created above. Collecting the data is only step 1. Determining what to do with the data is another story altogether. For now, I'm going to let this script churn for 3 to 4 weeks, and see what data is generated before deciding on next steps.
Update, July 12, 2017: So I let this run for much longer than 3-4 weeks, and I have over 8,000 test runs that sufficiently confirm that, indeed, I'm not getting the speeds I pay for.

Update, May 20, 2021: I've switched to Google Nest Wifi and now pay $85/mo for 600mbps download speeds. Actual speed measures roughly 480mbps on average and the Nest mesh wifi was stupid simple to configure.
Ihave heard there are troubles of more than one kind. Some come from ahead, and some come from behind. But I've brought a big bat. I'm all ready, you see. Now my troubles are going to have troubles with me!
- Dr. Seuss

Hi, Shaun here. No, not the soccer player. And not the children's performer. Just me, a 40-something father of two, residing in Raleigh, NC, where the summer heat has me questioning my life choices.
I try lots of things. I'm okay at some of them. My hobby is collecting hobbies. I drink a lot of coffee. I'm susceptible to ear worms. I throw myself into the things I love. I can't wait for the weekend.